Using Ninite Pro in Conjunction with Group Policy to Automate Third-Party Application Patching
In my quest, as the lone Sys Admin for an SMB, to automate third-party application patching and installation, I have found the inexpensive yet invaluable tool, Ninite Pro. This article assumes that you have a Microsoft Active Directory domain, have the permissions necessary to create GPOs and have subscribed to or are trialing Ninite Pro. Also, I am assuming you know basic server administrative tasks, such as sharing a folder, using GPMC, etc.
Introduction to Ninite Pro
Ninite Pro is a small application that allows for local and remote installation and patching (upgrading) of quite a number of applications and plug-ins, like Adobe Flash Player, Adobe Reader, Java, LogMeIn, GoToMeeting, etc. (For the complete and current list, please visit the Ninite site) On their cheapest plan ($20/month, billed annually), you can keep 100 different computers updated.
One of my favorite features is the download caching. This allows you to store the most recent versions on a network share for use by all your local clients saving your bandwidth. Another is the update only feature, which allows you to blindly select tons of computers and only the computers that already have those applications installed, will get the update. That way you don’t have to worry about keep track of who gets what. If they have it installed, they get the update; if not, they don’t.
There are two main ways to use Ninite Pro – the GUI and the CLI. The GUI allows you to perform local and remote installation, removal or updates on demand and is in a simple layout. The CLI is also simple but has several switches that allow you to create a batch file to run the exe to only install updates, prevent shortcut creation, etc. For a complete list of CLI switches, please visit the Ninite site . You can combine this method with a network share and scheduled task deployed via GPO to allow automate patching of all computers in an AD domain/site or a select few, using WMI filtering. Plus, you can even create a semi-automated way for remote clients, like laptops to update directly from the Internet.
Automating the Patching Process: An Overview
There are several steps involved in automating the patching process. These are the main steps:
- Downloading the Niniteone.exe file to a shared directory, accessible to all users on your LAN.
- Writing a simple batch file using the desired switches and specifying the applications.
- Creating a scheduled task in a GPO and applying it to an OU
Automating the Patching Process: Creating Your Batch File
*Note* Now is a good time to make sure that you have your Niniteone.exe file in your shared folder.
Writing a batch file for this task is quite simple but there are some tricks you can use to overcome some obstacles like processes that are running at the time the patching occurs, preventing the running app from being updated.
Here is a sample of the batch file I created for my environment:
taskkill /IM skype.exe /F
taskkill /IM g2mstart.exe /F
taskkill /IM g2mlauncher.exe /F
\\ServerName\ShareName\NiniteOne.exe /cachepath “\\ServerName\ShareName\NiniteDownloads\files” /silent \\ServerName\ShareName\reports\%computername%.txt /select Firefox Skype Flash “Flash (IE)” “7-Zip” Air Chrome CutePDF GoToMeeting iTunes Java “Java 8” VLC WebEx Evernote CDBurnerXP Spotify Dropbox “Reader 11” /updateonly /disableshortcuts /disableautoupdate
The first 3 lines are taskkill commands to stop the running processes for Skype and GotToMeeting. These applications usually start with Windows, by default, so they are usually running. If they aren’t or the application isn’t even installed, they won’t harm anything or cause the batch file to fail.
Line 4 is extremely long but don’t let that intimidate you. It is made up of a few sections that we will go over one by one.
You should already be familiar with the UNC path, so start the command by substituting the place holders for your actual server and share name where you placed the NiniteOne.exe.
The /cachepath switch, indicates the location where you want to cache all of the latest versions of the installer files. In this example, I have created a subdirectory in my shared folder called NiniteDownloads and another inside that called files.
The /silent switch, makes sure that the process does not show any UI while Ninite Pro is running AND allows you to specify a directory to save a .txt report file for each computer. This allows you to see the results of the last run. In this example, I have created a sub directory in my shared folder called reports and using the variable, %computername%.txt, allows it to take each computer’s name and titles the report with their respective names.
The /select switch, is followed by the list of all the applications you wish to use in the command. The syntax of the names is important. To see the full list of applications and their respective names/syntaxes, visit the Ninite site
The /updateonly switch, allows Ninite to only install the update to a system that already has the applications installed. That way, you don’t have to worry about computers installing applications that you didn’t want installed.
The /disableshortcuts switch prevents desktop and quicklaunch shortcuts from being created.
The /disableautoupdates switch prevents the annoying popups and balloons from appearing, requesting that you install the latest update. To view the supported applications, visit the Ninite site .
Now that you have an idea on how to create the batch file, open up notepad or another text editor, like Notepad++, and copy and paste my example (or create your own) and save the file as a .bat file (NOT .txt) into your shared folder and save it as NiniteLANUpdate.bat (You should now have 2 files; the niniteone.exe and NiniteLANUpdate.bat)
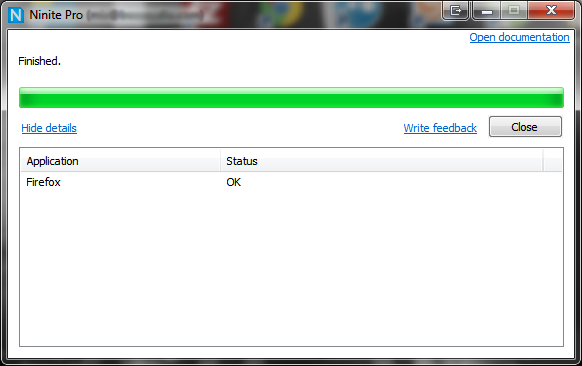
You can test the batch file by double-clicking it and checking your running processes in the task manager for Ninite. Provided that this was successful, move onto the next part.
Creating a GPO to Deploy a Scheduled Task
Now we move onto configuring a GPO to deploy a scheduled task to your targets. I am working with Server 2008 R2 SP1 in a forest at Server 2008 R2 Forest and Domain Functional Levels and Windows 7 Pro x64 with RSAT installed.
First, open GPMC (Group Policy Management Console) and create a new GPO. I called mine NiniteUpdateLAN.
Drill down through Computer Configuration> Preferences> Control Panel Settings> Scheduled Tasks. Right click in the blank pane and select New> Scheduled Task (Windows Vista and later).
General Tab
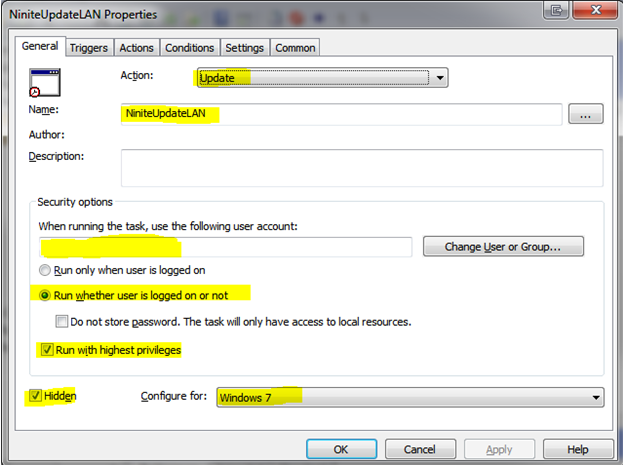
• Action: Update
• Name the Scheduled task. It can be whatever you want but I kept things uniform and went with NiniteUpdateLAN.
• Author: Automatically populated
• Description: Optional
Security options
• When running the task, use the following user account: Select an account that will have the appropriate access to run the scheduled task. I used NT AUTHORITY/SYSTEM
• Run whether user is logged on or not – Selected. Do not store password… Unchecked
• Run with highest privileges – Checked
• Hidden – Checked
• Configure for: Windows 7
Triggers Tab
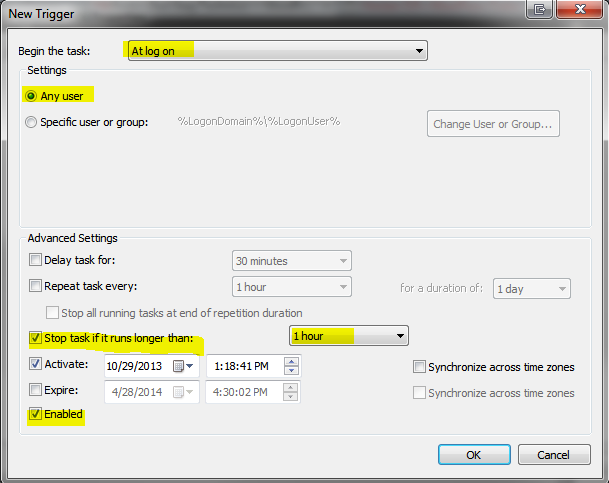
• Create a new trigger
• Begin the task- At log on
• Settings – Any user
• Leave other settings at their defaults. You can opt to configure them if you choose.
Actions Tab
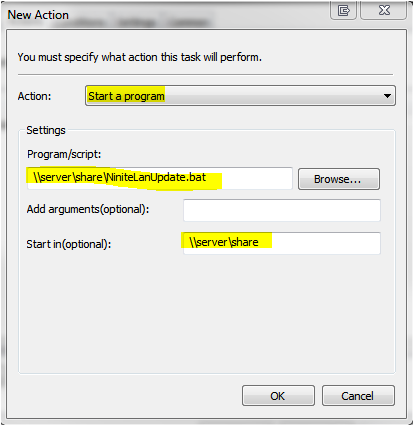
• Action: Start a program
• Program/Script: Browse to the \\server\share that we created earlier and select the .bat file
• Add arguments: Leave blank
• Start in…: \\server\share\ – the very same one where the bat is located.
Conditions Tab – I left these as defaults.
Settings Tab

Common Tab – I left these all blank for my scenario.
After you hit OK, you will see your scheduled task listed and will have a yellow, triangle on the icon. That just means you have selected the update option in the general tab of the scheduled task.
Now you can link your new GPO to an OU with your computer objects in it.